- Enable POP in the Zoho Mail interface.
- Launch Outlook application in your system.
- From the menu, browse to Tools » Account Settings » Email Accounts » Email tab
- Click New to open ‘Add new email account’ window.
- In Add New Account settings page, Select ‘Manually configure Server settings or Additional Server Types’ » Click Next
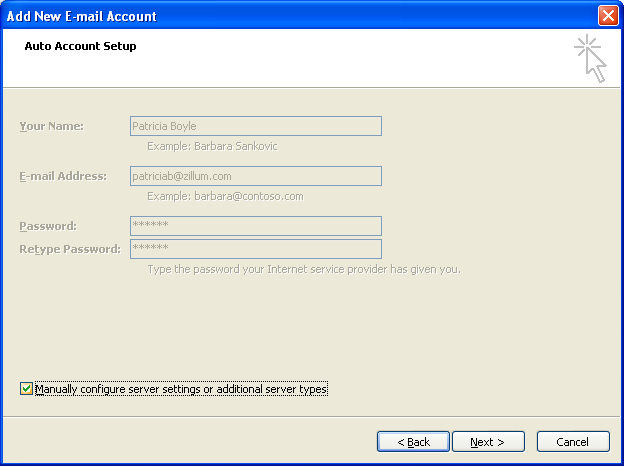
- Select Internet Email in the page that appears and Click Next to input the User Information.
- User Information
- Your Name – Preferred Display Name
- E-mail Address – Provide your Zoho Account Email Address
- Account Type – Select POP3 for enabling POP
- Server Information for Organization users
- Incoming mail Server – poppro.zoho.com
- Outgoing mail Server – smtp.zoho.com
- User name – you@yourdomain.com (Your Zoho Account Email Address)
- Password – Zoho Account Password.Note: Provide Application Specific Password, if your account is TFA enabled.
- Server Information for Personal users
- Incoming mail Server – pop.zoho.com
- Outgoing mail Server – smtp.zoho.com
- User name – you@zoho.com
- Password – Zoho Account Password.Note: Provide Application Specific Password, if your account is TFA enabled.
- Select ‘Remember Password’

- Click ‘More Settings’, for advanced configuration detail. In the dialog that appears, select 'Outgoing Server'.
- Select ‘My outgoing server (SMTP) requires authentication’
- Select the option ‘Use same settings as my Incoming server’
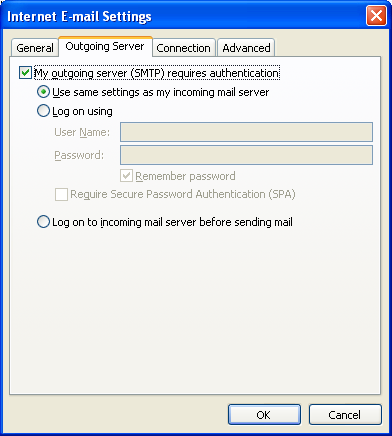
- If this option is not set, you may get an error 'Authentication Required' or 'Relaying Disallowed' error.
- The Relaying Disallowed Error may also occur when the 'email address' is provided incorrectly and does not match the email address set up for the account, whose credentials are provided in the email client.
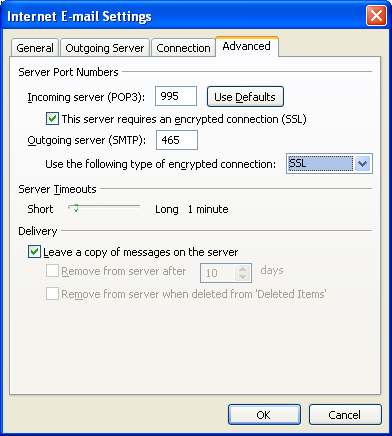
- Select ‘Advanced’ to specify the port details for the POP and SMTP servers.
- Incoming Server (POP3): 995
- Select ‘This server requires an encrypted connection (SSL)’
- Outgoing Server (SMTP): 465
- Select ‘SSL’ from the drop down for encrypted connection
- Select ‘Leave a copy of messages on the server ‘ if you need it in Zoho mail also. Refer 'POP Delete settings' for deletion behavior in Zoho Mail.
- Click Ok to Save the settings and exit.
- Select 'Test Account Settings' to check the settings for Incoming and Outgoing Servers. Make sure, you have a working internet connection, with permissions for Outlook to access the Internet.
- Once the Incomin/ Outgoing tests are successfully completed, Outlook displays the dialog as below.
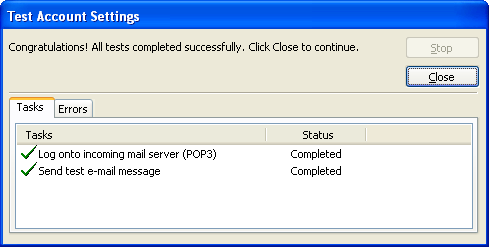
- Select Close and Finish to save the configurations and exit.
Knowledge Sharing ...
Nhận xét
Đăng nhận xét